To make a works cited page in MLA format, start a new page at the end of your paper, center the heading “Works Cited” at the top, and list your sources alphabetically with double spacing and a half-inch hanging indent on every entry. If your class uses APA, the same page is called References and the entries look different. This guide covers both.
A works cited page is not optional decoration. It is how a reader gets back to the sources behind your argument, and in most English and humanities classes it carries points on its own. Get the heading, the spacing and the indent right and the rest is just detail work.
The whole process takes about 45 minutes once your sources are collected. Most of that time goes into pulling author names, dates and page ranges out of sources you read weeks ago, not into the formatting itself.
Table of Contents
- What You Need
- Step-by-Step
- Step 1: Confirm the Citation Style
- Step 2: Gather the Information for Each Source
- Step 3: Start the Page Correctly
- Step 4: Format the First Source
- Step 5: Add the Remaining Sources
- Step 6: Alphabetize and Apply Hanging Indents
- Step 7: Proofread the Final Page
- Common Mistakes
- Frequently Asked Questions
- Should I call the page Works Cited or References?
- Do I repeat the Works Cited heading if my list runs onto a second page?
- Are hanging indents 0.5 inches or 1 inch?
- How do I alphabetize a source with no author?
- Can I use a citation generator instead of formatting entries myself?
- How many sources do I need on a works cited page?
- Conclusion
What You Need
Before you type a single entry, four things need to be settled. Skipping this part is what leads to a page that gets half the formatting right.
- The style your instructor wants. MLA, APA, Chicago and Turabian all produce a final source list, and they are not interchangeable. Check the assignment sheet, the course syllabus or the sample paper your professor posted.
- The details of each source. Author names, full title, container title, publisher or site, publication date, page range, DOI or URL.
- A fresh page set up to spec, so you are not fighting formatting that belonged to the body of your paper.
- One reliable guide. The MLA Handbook, 9th edition, the Purdue Online Writing Lab, or your school’s library guide. Citation generators are useful for a first pass but they get details wrong often enough that you still have to check every line.
Here is the page setup most MLA papers need, with the mistake that trips people up most often.
| Element | Required setting | Common error |
|---|---|---|
| Page start | New page, after the paper’s last paragraph | Works Cited runs on from the essay |
| Heading | “Works Cited,” centered, plain text, 12-point | Bolded, underlined, or in quotation marks |
| Margins | 1 inch on all four sides | Legacy templates left at 1.25 inch, or a narrow margin carried over from a prior paper |
| Font | Readable 12-point serif such as Times New Roman | 11-point body text, or a mix of fonts |
| Spacing | Double-spaced, with no extra space between entries | Single-spaced with blank lines between entries |
| Indent | 0.5-inch hanging indent on every entry | First line indented instead of the rest |
| Header | Last name and page number, top right | Header missing on the Works Cited page |
One naming question comes up constantly, and it is worth settling early because the answer changes your heading and your entry format.
| Page name | Style | What goes on it |
|---|---|---|
| Works Cited | MLA | Only sources cited in the text |
| References | APA 7 | Only sources cited in the text |
| Bibliography | Chicago | All sources consulted, cited or not |
| Annotated Bibliography | Any | Each entry plus a short summary and your evaluation |
So no, a work-cited page is not the same as a reference page, even though both list only the sources you used. MLA and APA both keep the list narrow. Chicago widens it to everything you read.
Step-by-Step
Step 1: Confirm the Citation Style
Read the assignment again and find the explicit instruction. It usually says “MLA 9th edition” or “APA 7th edition,” and that number matters because formatting changed between editions. If the assignment is vague, email your instructor and ask rather than guessing. A one-line reply saves a full rewrite.
The worst outcome is mixing styles within one page. Half the entries in MLA punctuation and half in APA punctuation looks like a formatting error even when each individual line is nearly right. Pick one and stay in it.
If your instructor has given a house variation, follow the instructor. A required departure from the handbook, such as listing a state abbreviation or a required header style, outranks the general rule for that class.
Step 2: Gather the Information for Each Source
Most broken entries are missing information rather than mispunctuated, and the missing piece is usually the same one every time. Pull these details for each source as you go.
- Author names in full, as printed, in the order they appear on the title page.
- Full title of the source and, for anything online, the title of the container such as the website, journal or streaming channel.
- Publication details: publisher, journal volume and issue, site name, edition, translators and editors.
- Date, at the level of detail the style wants. MLA uses just the year for most entries; APA uses a full date.
- Page range or paragraph numbers for a chapter or article.
- A DOI if one exists, or the URL if one does not.
The publisher’s own database page is usually faster than the book’s copyright page, and a DOI beats a link every time when both exist. If you cannot find a date, look for a last-updated or copyright year on the site and use that rather than leaving the slot blank.
Step 3: Start the Page Correctly
Put your cursor at the very end of the paper and insert a page break. A manual break, not a series of returns, is what keeps the new page from drifting if you edit later.
Then type Works Cited in the header line, centered, in plain 12-point text. No bold, no italics, no quotation marks, no all caps beyond that. On the Works Cited page itself the heading stays centered in the body of the page, one inch down; the running head with your last name and page number sits in the top right margin.
For APA the heading is References, centered and bold on its own line, and the running head is a short title rather than your name.
Set margins to 1 inch on all sides, double-space everything including the heading, and let the first entry follow on the next double-spaced line.
Step 4: Format the First Source
MLA builds every entry from nine core elements, and they appear in a fixed order: author, title of source, title of container, other contributors, version, number, publisher, publication date, and location. Optional elements such as a DOI or access date slot in where they belong in that sequence.
Two elements carry the rules students most often miss. Standalone works get italics; works that sit inside a larger work get quotation marks around their title and italics around the container’s title. And titles use title case, which capitalizes every major word but leaves articles, short prepositions and conjunctions lowercase unless they open or close the title.
A book in MLA looks like this:
Fitzgerald, F. Scott. The Great Gatsby. Vintage, 2013.
The shape of it: author inverted with the last name first, period, title in italics and title case, period, publisher, comma, year, period. No city of publication, which older guides still show.
An online article in MLA takes one extra step because the article title and the site title sit at different levels:
Ravitch, Diane. “When a School Loses Its History.” The Atlantic, 15 Mar. 2021, www.theatlantic.com/education/archive/school-history/592101/. Accessed 4 Apr. 2026.
And for APA 7, the same book looks different in ways that matter: the author’s name is not inverted, the year moves up next to the author in parentheses, the title drops to sentence case, and the publisher location that APA 6 required is gone in APA 7.
Fitzgerald, F. S. (2013). The Great Gatsby. Vintage.
Step 5: Add the Remaining Sources
Author names change the format, so handle the count before you copy anything. One author, invert the name. Two authors, invert the first and keep the second in normal order, joined by “and.” Three or more, list the first followed by “et al.” with a period.
When the same author appears more than once, MLA replaces the name on the second and later entries with three hyphens and a period, sorted by title. APA instead repeats the name and uses an em dash in its place.
For containers and titles, italicize the container and quote the part. A chapter title goes in quotation marks, its book title goes in italics. A short story goes in quotation marks, the collection or journal around it in italics. A video or podcast episode title is quoted and the platform or series name is italicized.
Finish every entry with a period, and remove the hyperlink formatting from URLs so they read as plain black text. Do not add a period after a URL or DOI, and never hand-hyphenate a long link.
Step 6: Alphabetize and Apply Hanging Indents
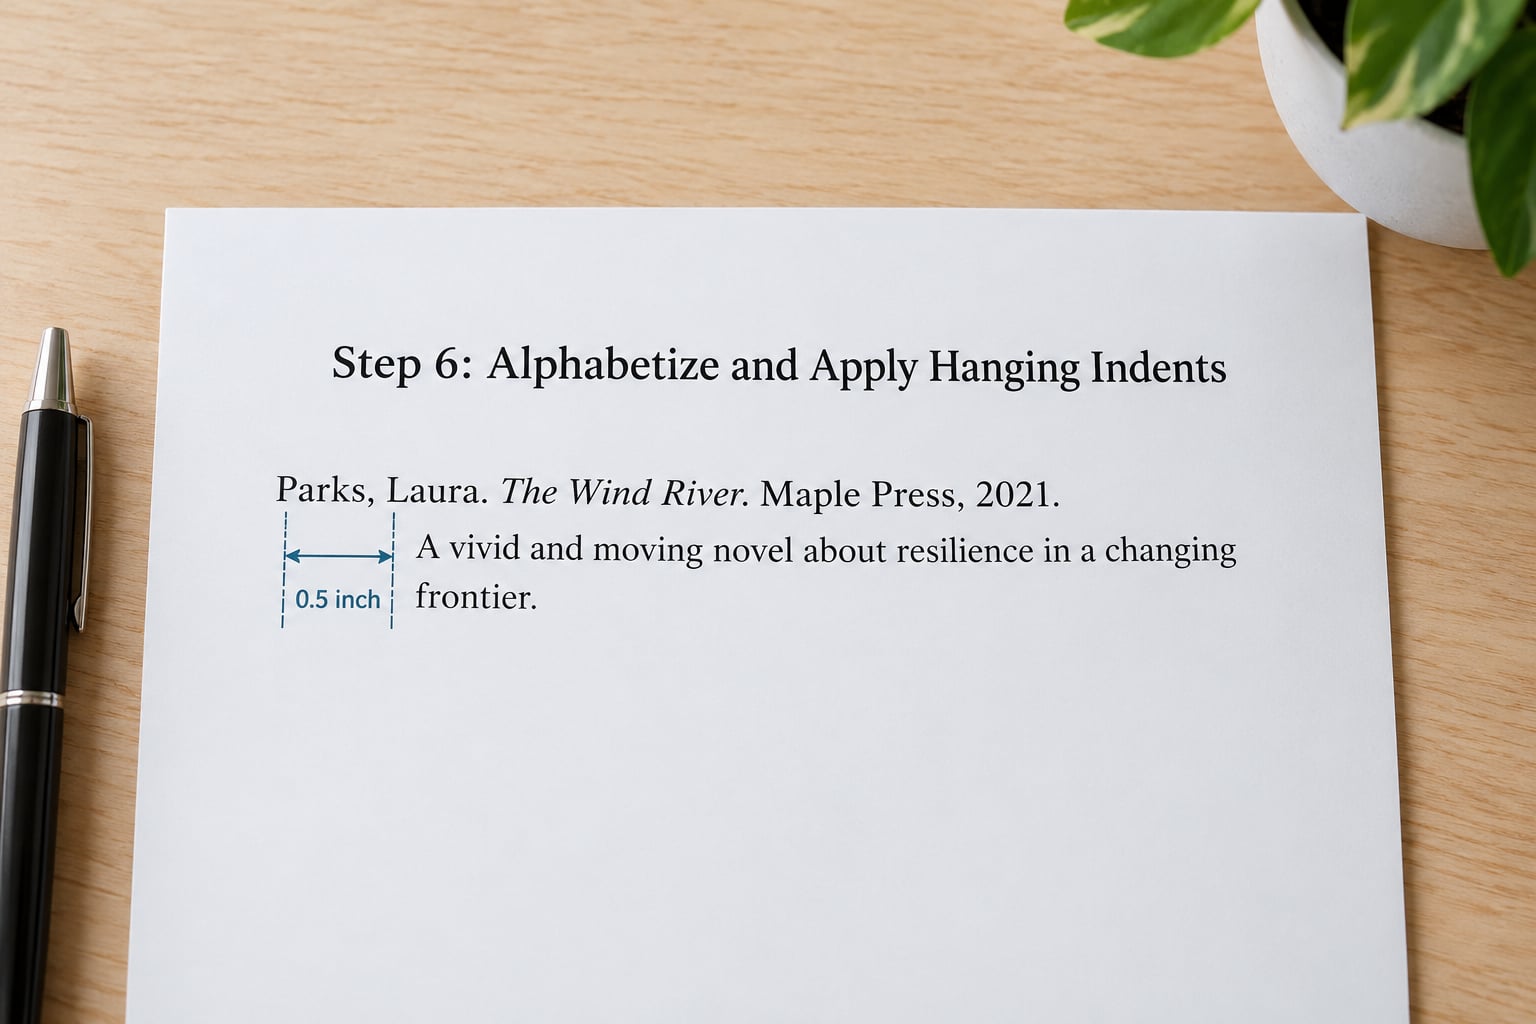
Alphabetize by the first element that appears in each entry, which is usually the author’s last name. Ignore leading articles, so “The Great Gatsby” files under G, not T. If there is no author, move to the title and use the same article rule. Titles opening with a number or symbol sort as if the number were spelled out or the symbol ignored.
Letter by letter works until you hit McDonald versus Macdonald or a two-word surname. When you get stuck, use a library guide’s rules, which handle these cases explicitly.
Then apply the hanging indent to the whole list at once, which is where most students get stuck. The indenting applies to every entry, not to one selected paragraph.
In Microsoft Word, select all the entries with Ctrl+A or by dragging down the list, then press Ctrl+T. That opens the Paragraph dialog with Special set to Hanging and By set to 0.5″. Click OK and every selected entry shifts at once.
In Google Docs, select all the entries, open Format and then Paragraph, go to Indentation and spacing, set the Special dropdown to Hanging and By to 0.5″, then click Apply. Set Indent first line to 0″ so nothing gets pushed further right.
A hanging indent means the first line of each entry sits flush with the left margin and every line after it sits half an inch to the right. It is half an inch, not a full inch, in both MLA and APA.
Step 7: Proofread the Final Page
Run these checks in order, because they catch almost everything.
- Heading reads Works Cited for MLA or References for APA, centered and unbolded for MLA.
- Header shows your last name and page number, top right.
- Every entry is double-spaced with no blank lines between them.
- Every entry has a 0.5-inch hanging indent.
- Entries run A to Z with no strays.
- Every source cited in the text appears here, and nothing here is missing from the text.
- Italics landed on containers and standalone titles, quotation marks on parts.
- URLs are plain text with no trailing period.
- Margins are 1 inch and the font is 12 point throughout.
- A second page exists only if the list is genuinely that long, and you do not repeat the centered heading on it.
That last point trips people up. If your list spills onto a second page, keep the running head going and let the entries continue. The centered Works Cited heading appears once.
Common Mistakes
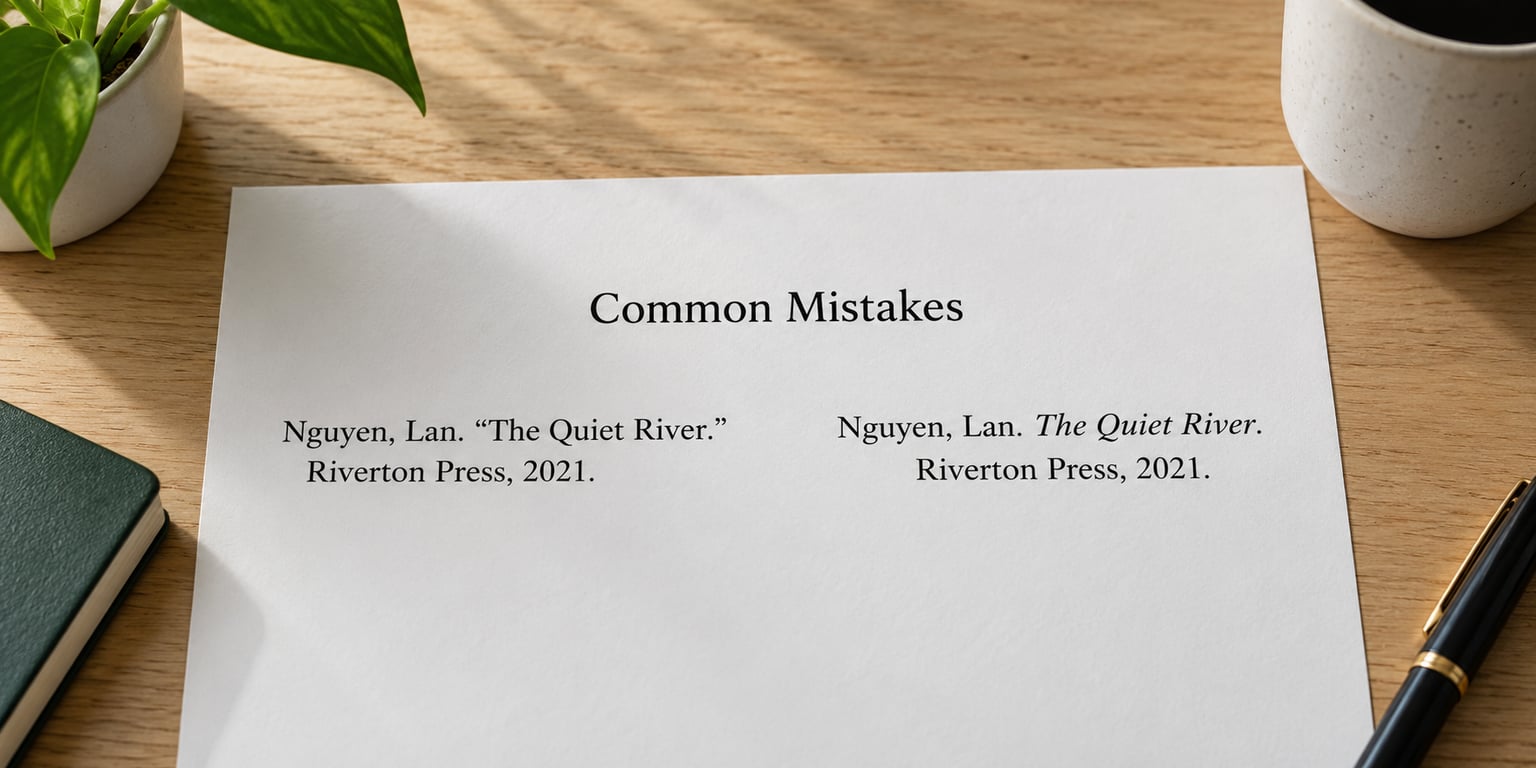
Almost every lost point on these pages comes down to one of a handful of errors. Here they are side by side.
| Issue | Incorrect | Correct |
|---|---|---|
| Wrong page name | References heading on an MLA paper | Works Cited |
| Bad indent | First line pushed right, rest flush left | First line flush left, rest 0.5″ right |
| Wrong spacing | Entries separated by a blank line | Double-spaced, no extra space |
| Italics on the wrong part | “The Great Gatsby” in italics and quotation marks | The Great Gatsby in italics, no quotation marks |
| Out of order | Entries alphabetized by title when authors exist | Alphabetized by the first visible element |
| Live links | Blue, underlined URL | Plain black URL text, no trailing period |
| Decorative heading | Works Cited in bold | Plain 12-point text, centered |
A few deserve extra emphasis. Italics and quotation marks are not interchangeable decoration; they tell the reader whether you read the whole work or only part of it, and mixing them up reads as carelessness.
The other big one is the mismatch between in-text citations and the list. If you quoted a source in paragraph three, that source belongs on this page. If you read something but never referenced it in the text, it does not belong here in MLA or APA. That single habit, cross-checking the page against your draft, catches more errors than any formatting fix.
Students also ask which mistake hurts more, a wrong in-text citation or a wrong entry. The entry, usually, because it is the thing a teacher checks line by line and it is where details pile up. But a mismatch between the two means one of them is wrong anyway.
Frequently Asked Questions
Should I call the page Works Cited or References?
It depends on the style your instructor assigned. MLA uses Works Cited, centered and in plain text. APA 7 uses References, centered and bold. Chicago uses Bibliography. If the assignment does not say, ask your instructor rather than guessing, because the heading is one of the first things a teacher checks.
Do I repeat the Works Cited heading if my list runs onto a second page?
No. The centered heading appears once at the top of the first page only. On the second page, keep your running head with your last name and page number in the top right, and let the entries continue straight on. Adding a second centered heading is a common and easily marked mistake.
Are hanging indents 0.5 inches or 1 inch?
Half an inch in both MLA and APA. The first line of each entry stays flush with the left margin and every line after it sits 0.5 inches to the right. In Word, select all your entries and press Ctrl+T, then confirm By reads 0.5 inches.
How do I alphabetize a source with no author?
Move to the next visible element, which is the title, and ignore leading articles so A, An and The are skipped. If two titles would land in the same spot, compare the next element, usually the container or publisher. Titles beginning with a number or symbol sort as if the number were spelled out or the symbol ignored.
Can I use a citation generator instead of formatting entries myself?
Use one for a first pass, then check every line by hand. Generators routinely mess up author name order, title capitalization, edition numbers and whether a URL or DOI belongs there. They also tend to produce MLA 8 style when you asked for MLA 9, so a quick comparison against a library guide saves the same time you spent generating.
How many sources do I need on a works cited page?
Exactly as many as you cited in the text. There is no minimum in MLA or APA, and padding the list with sources you only skimmed reads worse than a short list. One source cited well beats five entries where four were never used.
Conclusion
Start by confirming which style your instructor wants, because that decision sets everything else. Collect the author, title, container, date and location details for each source while you still have the source open, then format one entry and use it as the pattern for the rest.
Alphabetize by the first visible element, apply the half-inch hanging indent to every entry at once, and finish by cross-checking the list against your in-text citations. That last check catches the mistakes teachers notice most, and it is faster than fixing formatting on a page that lists the wrong sources.